Wednesday, May 13, 2009

'Soldier Bar' illustration in progress; finally 'lazy' enough to use live trace


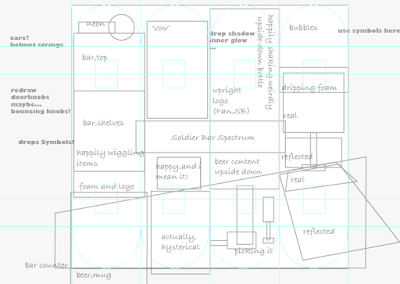
layout sketch

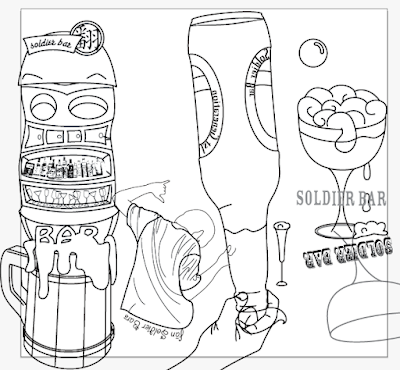
progress so far (5-13)
(Ai: Adobe Illustrator) 'Soldier Bar' finger board deck graphic design project

My great skateboard pal, Geng, who's a skateboard shop keeper, is trying to produce some decent wooden fingerboards. For the graphics on the deck, he asked me to 'design' a few. yeah there's quotation marks on that word because I'm not a person who draws! But, I'd like to be one and took the opportunity.

Don't have a Wacom tablet. (Actually I'm planning to get an intuos4) But this won't make much of a difference cause I'm planning to draw in Ai. If I draw in Ps, even with a tablet I'd die of frustration by now...

In Ai you draw vectors, which doesn't require you to drag a mouse/pen across a imagined line in order to draw it. Rather you define points and two directions for each point. As a result it is easy to produce perfect curves and they are extremely easy to edit. Perfect for a person like me who can't draw a nice curve in one stroke.

In fact I only watched some starters tutorials and never drew anything in Ai. So before I start to mess everything up I diligently watched Deke's Illustrator CS4 one-on-one: fundamentals and followed along with the exercise files provided. After that I really felt to have a solid foundation on using Illustrator. The shortcuts I memorized proved to be a life-saver when I worked on the project.

But I was not felling ready for the project. I then hand-traced a picture of Detective Conan using traditional approaches. Later I watched some of Mordy's Ai CS4: Beyond the basics tutorials and learned some very valuable modern illustrator techniques and realized that the Conan portrait could be be easily drawn within a few clicks using the live trace feature. I also discovered the live paint feature, which changed my approach of drawing with vectors entirely. live paint gave me the power to modify path attributes based on appearance (what I see on screen).

After some more testing in Ai I started the project. I measured the dimensions of a fingerboard to create some guides. I then made a layout sketch of the design and started this exacting project. While I worked on it I'm still wathcing some new tutorials to gain some inspirations in terms using the program. For inspirations on designing the deck I collected many elements from the web. I also took pictures of things that might be useful, including some scribbles I did while at a friend's house.

The second screenshot shows my progress so far.

Today I did the wine glasses and liquers on the shelves. For the first time I utilized the live trace feature. The liquer bottles are live traced, and I hand traced masks for them. The bottles will appear very small on finger boards, so I could create some typical liquer bottle outlines and duplicate them. But I think live traced bottles give them a feel of liquer bottles. Because liquer bottles are usually quite complicated they deserve more details. At least they should 'look like' with more details. Anyways, if it could get your work done as well, why not use the easier, automated feature?

Monday, May 11, 2009

Two days on Lightroom; Everything needs a screen protector


(Although irrelevant, I can't resist saying that I GOT MY FIRST SCRATCH ON MY SCREEN!!! though in fact it's a micro dent, it sits right in the middle of my screen, and I can see it NOW. BTW, finger nail did it. Fragile screen. Damn it.)

(Adobe Lr) High school class photo collection project

For high school graduation celebration, my school requires each class to pick and hand in 20-30 class photos. No idea what they will do with that. Anyways, I got to do this selection work, and there's only two days left, and I still have to work on a fingerboard graphic design. I was bound to have a crammed weekend.

From prior investigation on the web and my experience of using Aperture, I felt that Lr is the one suited for me. I never had a chance to learn it though I have Lr 2.3 installed on my Macbook and Lr 2 Essential Training movies downloaded on an external drive some weeks ago.

(Great! Had a hard time finding that screen blemish which turns out to be not so noticeable)

OK, crammed at least 20 chapters of essential training into my brain in one and a half day. But I didn't fell overwhelming at all and quickly applied the knowledge to the 700+ photos at hand. It was really fun though a little exhausting because Lr is such an elegant and powerful tool. The local adjustment brush is just fantastic! that's why Lightroom's called Photoshop Lightroom.

In the end I picked 27 photos and adjusted them. I exported them using two color spaces. Today I went to school and showed the photos to Ensy, who provided most of the photos to me. He swapped two of the picked photos for another two. I quickly adjusted the two and found myself caught in the middle of English class. What happened in the class is another post.

Monday, March 23, 2009

Lab 8 First movie project workflow

Today I decided to record my work flow of editing short movies. (I decided to do a lot of things, but just didn't have enough enthusiasm) This time I'm going to start doing it now by archiving my past work flows. (Starting from the very first)


(1) 'The video of 0609'
Sophomore year
A short movie about my class, 0609.
Equipment - Sony handy-cam tape USB interface, Panasonic camcorder tape 1394 interface a little flashlight in front, IBM laptop 256MB RAM, Premiere Pro 2.0, Windows Movie Maker

Work flow outline - [SHOOTING and PLANNING] -> [LEARN to use Premiere Pro 2.0] -> [IMPORT in full length] -> [CUT and ORGANIZE within Premiere Pro 2.0] -> [EDIT] -> [SHOOT extra footage] -> [EDIT] -> [EXPORT]

  1. Plan to have four chapters in this movie, Basketball, Learning, Music and Skateboard.
  2. two Cams, two shooter. Tell them to shoot as much as they can and don't worry about wasting tapes. I shot some as well.
  3. Went to hunt for a decent video-editing software. The shop-keeper recommended Premiere Pro 2.0 to me. Spent a long time installing it on my old IBM laptop.
  4. Went online for video tutorials on Premiere Pro 2.0. Soon had a basic sense of want Premiere Pro 2.0 can do. During this time formulated a more solid time line for the movie.
  5. Imported the footage via Windows Movie Maker's Capture function (I didn't know that Pr could capture footage). the footage was imported to its full length.
  6. Import footage into Pr. Put the full-length clips in one huge time line. Cut out segments of good footage and rename the portion in the time line. (Weird way of organizing, huh?) Made more time lines for categorizing these scattered footage. Moved footage to different time lines.
  7. Start editing by dragging the portions into a main time line.
  8. Had some more ideas during edit and shot the extra footage.
  9. Continue to edit.
  10. Export. OMG that was the most painful part. It took 5 or 6 hours for a 20-minute movie to be rendered out as I recall. What's more because of my lack of professional knowledge and experience I couldn't choose the right format, codec and dimensions. So I ended up rendering 4 or 5 times.

Sunday, March 22, 2009

Cleaning up my old portable drive

Just dumped all (deleted some though) data from my old 80G drive to my new 320G drive. The greatest discovery is some photos and videos from the past.

Ah!!!! I'm just having a hard time thinking of a solution to store my data in an organized way. My computer hard drive, which is 250G now has only 50G left. My 320G portable has only 158G left...

Monday, March 16, 2009

Finally I decided to post

It's been a long time since I last posted. Looking back I actually think I did nothing during this time although on second thought I finished two training series and a video project. But It is hard to evaluate whether or not I was productive during these days because of the lack of information. So I'm going to keep up the work.

I have some thoughts of starting a full-Chinese blog/space in QQ. The topic's 'Why English is important/fun'. Unlike this blog I want to share my thoughts with my Chinese friends.

Friday, March 6, 2009

Yahoo Finance provides false exchange rates, or my units conversion widget's currency portion is broken


Picture 1 shows the correct conversion between hour and minute
Picture 2 shows the exchange rates data provider - Yahoo Finance
Picture 3 and 4 shows the false exchange rate between US Dollars and Chinese Yuan (which should be 1USD = 6.XXX RMB)
Picture 5 shows the false exchange rate between USD and USD!
What the hell is going on?

This converter(or the data provided by some company) almost made me buy a Macbook Pro in Hong Kong. This converter(or the data) told me that a new aluminum Macbook Pro cost only $700(converted from Hong Kong dollars)!

This converter comes with leopard

Wednesday, March 4, 2009

Lab 实验 7 Fan Team new video teaser 翻TEAM新片预告

Just Finished this 1 min teaser.
Fan Team has decided to make a new video. And this time totally different from before!

刚刚做完这个一分钟的预告片。
翻TEAM决定再次制作短片。这次绝对和以往不同!